Global Japanese Sushi Rolls
Highlighted under: Cultural Food
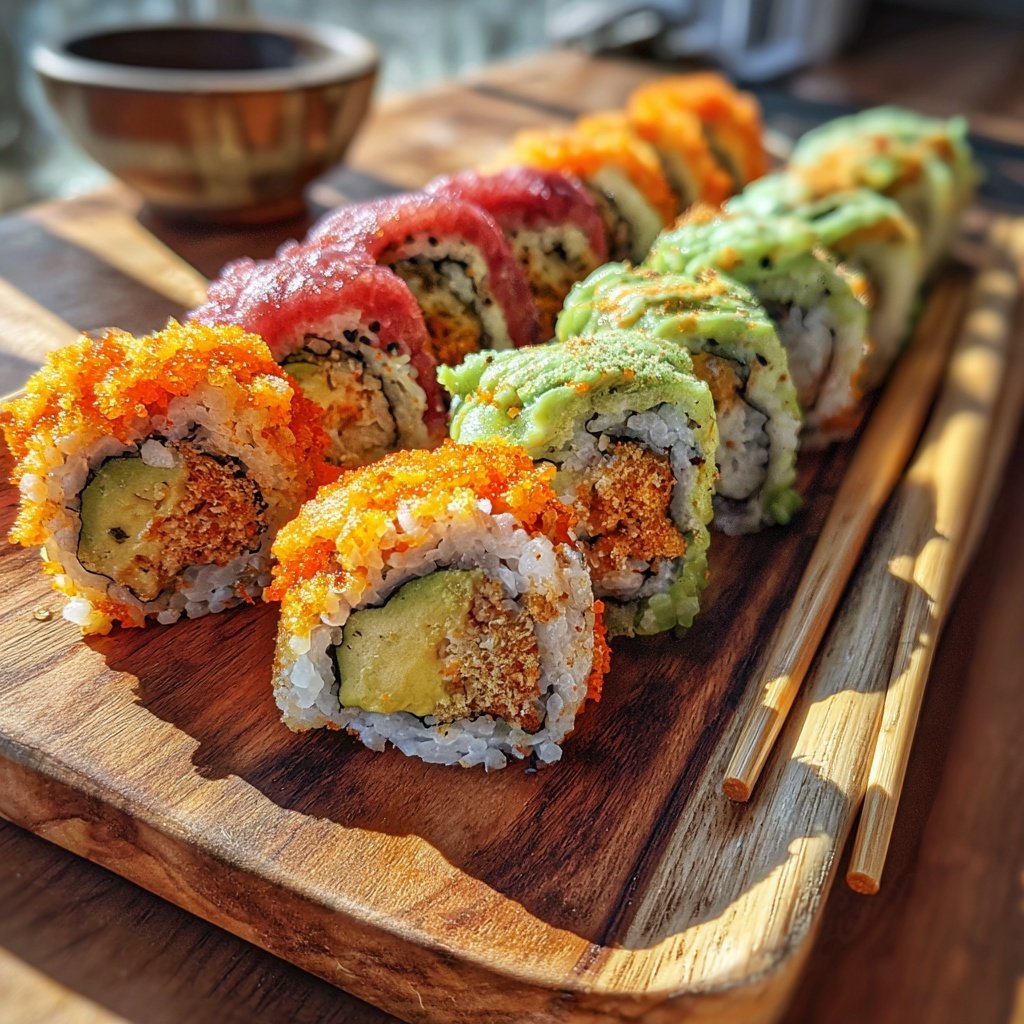
I absolutely love making sushi at home! Global Japanese Sushi Rolls bring a handmade twist to this classic dish, allowing me to experiment with different flavors and fillings. Each roll is a delightful blend of fresh ingredients, and the process is surprisingly easy once you get the hang of it. Whether I'm craving a spicy tuna or a veggie-packed roll, these recipes help me create a sushi night that's both fun and delicious. I can't wait for you to try this out and bring a taste of Japan to your table.
Making Global Japanese Sushi Rolls has been a culinary adventure for me. I remember the first time I rolled sushi; it felt like a creative outlet where flavors and textures come to life. Each roll is a reflection of my personality, encouraging me to be bold with ingredients.
One of the best tips I can share is to use a quality rice and let it cool to room temperature before rolling. This ensures that the nori stays crisp while creating a perfect balance with the fillings. The possibilities are endless, and every sushi night feels like a fresh challenge!
Why You'll Love This Recipe
- Endless filling options that cater to every palate
- A fun and interactive way to enjoy dinner with friends
- Light yet satisfying, perfect for any occasion
Mastering Sushi Rice
Sushi rice is the heart of any sushi roll, and getting it right will elevate your dish significantly. Start by rinsing the rice for about 5 minutes, ensuring that the starch is removed, which prevents clumping. After cooking, the rice should be slightly sticky yet firm—this helps it hold together in your rolls. Cool it to room temperature before adding the vinegar mixture, which should also be mixed gently to maintain the rice's structure.
The balance of vinegar, sugar, and salt is crucial to achieving that authentic sushi rice flavor. After cooking, let the rice sit covered for about 10-15 minutes before mixing in the vinegar blend. This allows the rice to absorb moisture and cool down healthily. For a firmer texture, consider using a short-grain rice designed specifically for sushi, as this will provide the ideal stickiness and chewiness.
Choosing and Preparing Fillings
When it comes to fillings for your sushi rolls, freshness is key. Opt for sushi-grade fish to avoid foodborne illnesses; this is essential if you're serving raw fish like tuna. For a fun variation, try marinating your fish in soy sauce and sesame oil for added flavor before assembling your rolls. You can also adjust the quantity of fillings to create a more balanced roll—aim for 2-3 types of filling to avoid overwhelming the rice and nori.
Don't be afraid to get creative with your vegetables and additional fillings. If you don’t have avocado, try using thin strips of bell pepper or radishes for crunch. Likewise, for a vegetarian option, consider using pickled vegetables or tempura vegetables. Remember, the size and shape of your fillings matter; julienne or thin slices work best for even distribution when rolling, making it easier to achieve the compact shape without any excess pressure.
Rolling Techniques and Serving Suggestions
When assembling your sushi rolls, positioning the nori correctly is crucial. The shiny side should face down on your bamboo mat, providing a better surface for sticking. Leaving that one-inch border at the top ensures that it will seal properly when you roll it up. As you roll, apply gentle but consistent pressure to avoid flattening the rice and fillings too much; you're aiming for a tight, cylindrical roll, not a pancake.
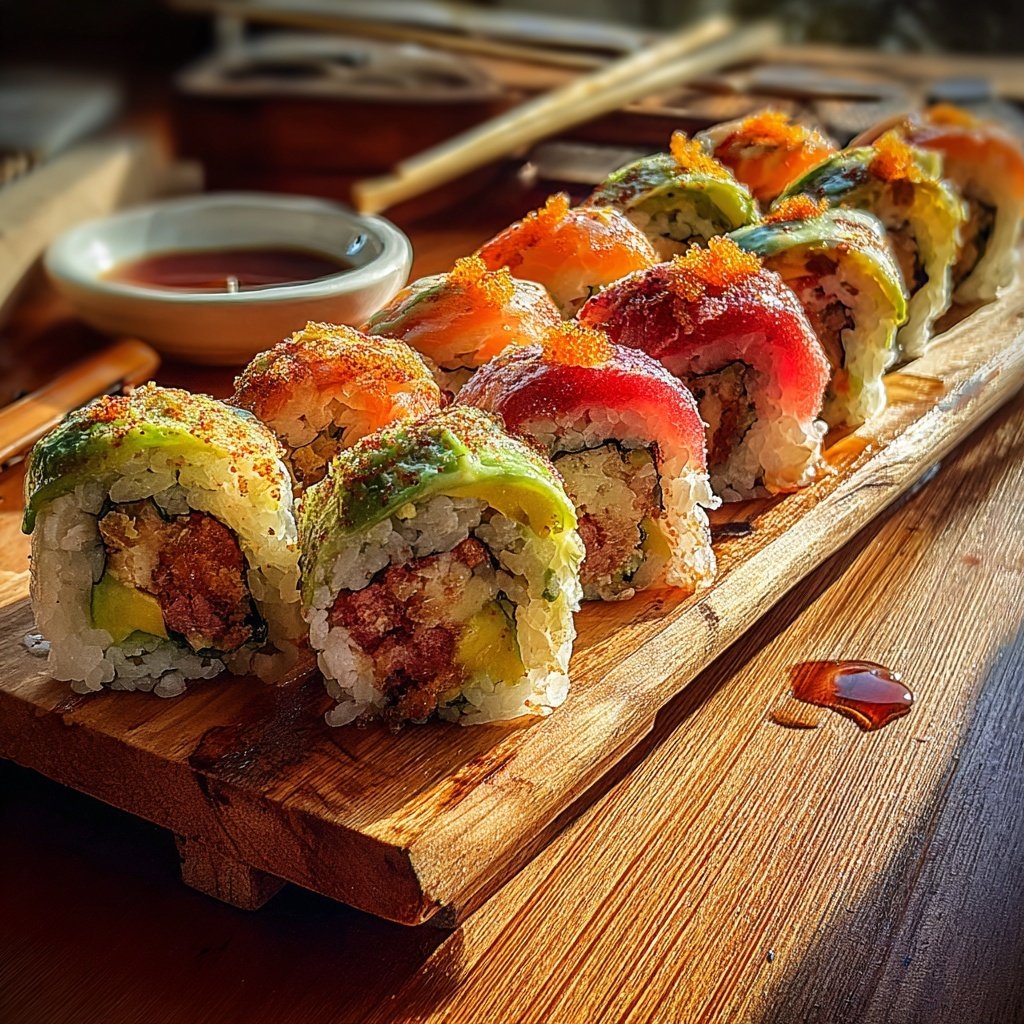
For serving, consider creating a sushi platter to impress your guests. You can pair different types of rolls with assorted dipping sauces, like soy sauce or a tangy ponzu. Adding a side of pickled ginger and wasabi gives diners the option to enhance their flavors. To preserve any leftover rolls, wrap them tightly in plastic wrap and store them in the refrigerator. However, consume them within 24 hours for the best flavor and texture.
Ingredients
Sushi Rice
- 2 cups sushi rice
- 2 1/2 cups water
- 1/4 cup rice vinegar
- 2 tablespoons sugar
- 1 teaspoon salt
Fillings
- 4 sheets nori (seaweed)
- 1/2 pound sushi-grade tuna, sliced
- 1 avocado, sliced
- 1 cucumber, julienned
- 1/4 pound cooked shrimp, peeled
- Creamy mayonnaise or spicy sauce (optional)
For Serving
- Soy sauce
- Pickled ginger
- Wasabi
Make sure to gather all your ingredients before you start rolling for the best experience.
Instructions
Prepare the Sushi Rice
Rinse the sushi rice under cold water until the water runs clear. Combine it with water in a rice cooker and cook according to the manufacturer's instructions. Once cooked, let it cool slightly before mixing in vinegar, sugar, and salt.
Prep the Fillings
While the rice is cooling, prepare your fillings by slicing the vegetables and seafood into thin strips for easy rolling.
Assemble the Rolls
Lay a sheet of nori on a bamboo sushi mat, shiny side down. Spread a thin layer of sushi rice on top, leaving a 1-inch border at the edge. Place desired fillings in a line across the rice.
Roll It Up
Using the bamboo mat, gently roll the nori away from you, tucking in the fillings as you go. Apply gentle pressure to shape the roll tightly.
Slice and Serve
Using a sharp knife, slice the roll into 6-8 pieces. Serve with soy sauce, pickled ginger, and wasabi.
Enjoy your homemade sushi rolls with friends and family!
Pro Tips
- For perfect rice, remember to measure your water accurately and let it sit covered for 10 minutes after cooking. Always wet your knife between cuts to avoid sticking.
Ingredient Substitutions
If you're looking for alternative proteins for your sushi rolls, consider cooked crab or smoked salmon, both of which provide rich flavors and textures. For a vegetarian option, try marinated tofu or tempeh for added protein and heartiness. Choosing fillings based on what's seasonal or locally available can also enhance flavor and freshness, allowing you to customize your sushi night.
For those with dietary restrictions, gluten-free soy sauce can be used to keep the dish safe for celiacs, while low-sodium varieties are available for those watching their salt intake. If you're avoiding rice altogether, cauliflower rice can serve as a lower-carb alternative. Just make sure to season it well and squeeze out any excess moisture to maintain the roll's integrity.
Make-Ahead Tips
To streamline your sushi night, you can prep the sushi rice and fillings ahead of time. Cook the rice up to a day in advance, and store it in an airtight container in the refrigerator. Just ensure that you're at room temperature before using it so it spreads easily on the nori without breaking seams. Pre-slicing your vegetables and proteins will also save time, allowing you to assemble quickly when you're ready to eat.
If you're feeling adventurous, you can even try freezing sushi rolls after they are made, but keep in mind that the texture may change slightly once thawed. It's best to consume fresh rolls for optimal taste. If you happen to have leftover sushi rice, consider using it in a rice bowl topped with your favorite flavors or as a base for other creative dishes the following day.
Questions About Recipes
→ Can I use brown rice instead of sushi rice?
While you can use brown rice, it won't adhere as well and may alter the texture of your rolls.
→ Do I need a bamboo mat to roll sushi?
While a bamboo mat makes rolling easier, you can also use a clean kitchen towel if you don’t have one.
→ What are some good vegetarian fillings?
Avocado, cucumber, bell pepper, and tofu are great vegetarian options!
→ How can I store leftover sushi rolls?
Store any leftover rolls in an airtight container in the refrigerator for up to 24 hours.
Global Japanese Sushi Rolls
Created by: The Chefoliviasfood Team
Recipe Type: Cultural Food
Skill Level: Intermediate
Final Quantity: 4 rolls
What You'll Need
Sushi Rice
- 2 cups sushi rice
- 2 1/2 cups water
- 1/4 cup rice vinegar
- 2 tablespoons sugar
- 1 teaspoon salt
Fillings
- 4 sheets nori (seaweed)
- 1/2 pound sushi-grade tuna, sliced
- 1 avocado, sliced
- 1 cucumber, julienned
- 1/4 pound cooked shrimp, peeled
- Creamy mayonnaise or spicy sauce (optional)
For Serving
- Soy sauce
- Pickled ginger
- Wasabi
How-To Steps
Rinse the sushi rice under cold water until the water runs clear. Combine it with water in a rice cooker and cook according to the manufacturer's instructions. Once cooked, let it cool slightly before mixing in vinegar, sugar, and salt.
While the rice is cooling, prepare your fillings by slicing the vegetables and seafood into thin strips for easy rolling.
Lay a sheet of nori on a bamboo sushi mat, shiny side down. Spread a thin layer of sushi rice on top, leaving a 1-inch border at the edge. Place desired fillings in a line across the rice.
Using the bamboo mat, gently roll the nori away from you, tucking in the fillings as you go. Apply gentle pressure to shape the roll tightly.
Using a sharp knife, slice the roll into 6-8 pieces. Serve with soy sauce, pickled ginger, and wasabi.
Extra Tips
- For perfect rice, remember to measure your water accurately and let it sit covered for 10 minutes after cooking. Always wet your knife between cuts to avoid sticking.
Nutritional Breakdown (Per Serving)
- Calories: 250 kcal
- Total Fat: 5g
- Saturated Fat: 1g
- Cholesterol: 30mg
- Sodium: 270mg
- Total Carbohydrates: 45g
- Dietary Fiber: 3g
- Sugars: 2g
- Protein: 8g